User Manual / 使用說明
| Utility for Taiwan.zip |
| Palert_Utility_Quick_Start_Guide_E_2022 (1).pdf |
| palert2ew_201912.zip |
| Palert Helpful Software (2).rar |
| P-alert Trigger Simulation.pdf |
Installation / 安裝
| Palert installation Instruction.pdf |
| Palert software_introduction.pdf |
| Palert_manual_c01.pdf |
| Palert_manual_e01.pdf |
Updates / 更新
| Palert_MiniOS_Firemware Update.pdf |
| Update of Palert.pdf |
| Palert Version revised list.pdf |
Settings / 設定
| Method of IP changing (2).pdf |
| NTP Tools usage.pdf |
| Palert Plus mseed.pdf |
| Method of FTP Function Setting.pdf |
User Manual / 使用說明
| S303_Quick_Start_Guide.pdf |
| Palert+ Hardware Manual V3.4_jelogix.pdf |
| Palert+ Web User Manual V2.0_jelogix.pdf |
| Palert Web User Manual_ENGLISH.pdf |
| Palert Plus User Maunal.pdf |
| Mount mode.png |
Methods / 方法
| P-alert Plus_Method of Getting Seismic File.pdf |
Installation / 安裝
| Palert Plus_Basic Hardware Insllation.pdf |
Update / 更新
| Palert plus firmware update steps.pdf |
| Major Update of Palert Plus, PX-01, and CUBE.pdf |
User Manual / 使用說明
| SanlienDAS Manual.pdf |
Installation / 安裝
| SanDAS-r1.0.23-win-x64.zip |
| SanDAS-r1.0.23-osx-x64.zip |
User Manual / 使用說明
| GL840-M散熱模組量測 (1).pdf |
| FCX2000&FCX4000中文DM-ok (2).pdf |
| FC9000中文.pdf |
| CE7000-130中文.pdf |
| CE7000-60中文.pdf |
| CE7000-40中文.pdf |
| CE7000中文繁體 (1).pdf |
Installation / 安裝
CM4外掛軟體
For Window (V4.50)=>https://mygraphtec.jp/site_download/cm4/data/CM4_W_V450.zip
For MAC (V4.80) =>https://mygraphtec.jp/site_download/cm4/data/CM4_M_V480.zip
2) CM2 外掛軟體
For MAC => http://www.graphteccorp.com/support/software/ctpl/C-Master2(M)v199.zip
3) 驅動程式
Window 8 以上 (32位元) =>http://www.graphtec.co.jp/site_download/ops662/file/OPS662v400.zip
Window 8 以上(64位元) => http://www.graphtec.co.jp/site_download/ops662/file/OPS662(Wx64)v400.zip
Window 7 (32位元) => http://www.graphtec.co.jp/site_download/ops662/file/OPS662v380.zip
Window 7 (64位元) => http://www.graphtec.co.jp/site_download/ops662/file/OPS662(Wx64)v380.zip
4) 遠端遙控軟體 anydesk
https://download.anydesk.com/AnyDesk.exe?_ga=2.94695580.1494231966.1588569959-147052142.1557109652
5) 其它
(請參閱附件檔:D-CUT.zip) (請參閱附件檔:D-Cut Master新版中文.zip) (請參閱附件檔:CM2_STD_V200.exe)
(請參閱附件檔:平台機操作.ppt)(請參閱附件檔:滾筒機操作.ppt)
(請參閱附件檔:滾筒機操作.ppt)(請參閱附件檔:平台機操作.ppt)(請參閱附件檔:CM2_STD_V200.exe)(請參閱附件檔:D-Cut Master新版中文.zip)(請參閱附件檔:D-CUT.zip)
| 滾筒機操作.ppt |
| 平台機操作.ppt |
| CM2_STD_V200.exe |
| D-Cut Master新版中文.zip |
| D-CUT.zip |
Installation / 安裝
| AMX-2200軟體手冊.zip |
How to locate a file in wms when coding?
Step 1. Check the link on address bar and look for “item=”. In the example below “item=project_list”
http://wms.sanlien.com.tw/sanlien_crm/user.php?item=project_list
Step 2. Connect to wms via FTP and navigate to /var/www/html/sanlien_crm/user.php
Step 3. Look for the case “project_list” and locate the file to edit.
Why is the wms displaying very slow when I click on “ISO”?
The ISO files are too heavy.
How to add a location, devices on location, and users ?
Step 1. Go to wms.sanlien.com.tw/sanlien
Step 2. Login with your credentials
Step 3 . Click on the device or project type (Palert Plus, VMS, Geo Tech)
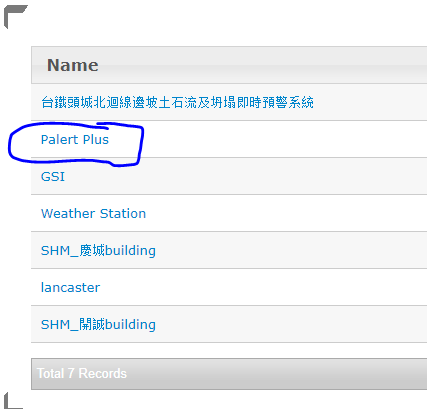
Step 4. Click the plus icon on the upper right corner to add new devices on the project
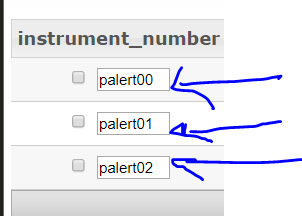
 Step 5. Edit the name and change the serial numbers
Step 6. Click the top menu bar in order to add location image

Step 7. Paste the devices location to the image you just uploaded
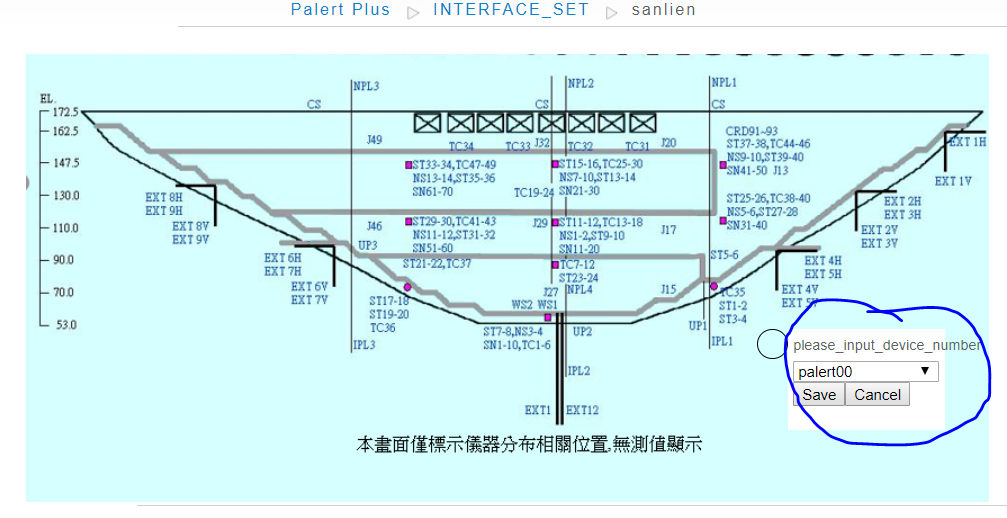
8. Add a user on the location you just created

9. You are all set!
How to find a device ISO2631 report on wms ?
Step 1. Go to wms.sanlien.com.tw/sanlien_crm/
Step 2. Log in your account
Step 3. Click on Palert Plus or the corresponding project name as shown in the picture below :
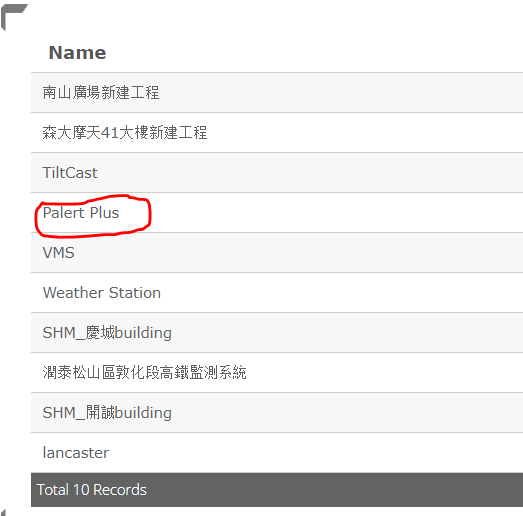
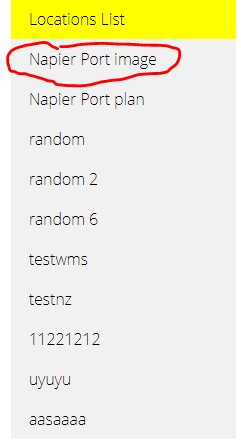
Step 4. Select the site location on the right menu bar, eg : Napier Port Image
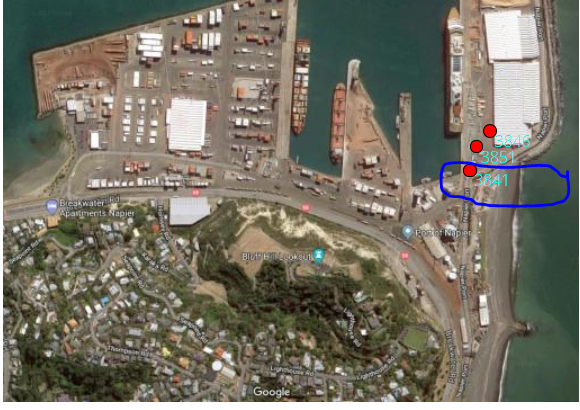
Step 5. Select the device you are looking for the ISO2631 report by clicking on its serial number that’s shown in the location image
Step 6. Click on the dropdown menu and click on ISO

How to configure PX-01 to generate RSHD report and upload on WMS?
| README_RSHD_ISO.docx |
How to set up a Palert station to upload DIN files to WMS?
Step 1. FTP connect to the station
Step 2. Navigate to /home/pi/Desktop/vAlert/bin/vAlert8.cfg
Step 3. Change serial_number with the serial number of the device and copy and paste the code below at the end of vAlert8.cfg
###########################################
# API
###########################################
[API_CONFIG]
EARTHQUAKE_FALLING_API YES
DIN_FILE_UPLOAD YES
[VWHUB_CONFIG]
FTPIP 125.227.41.128
FTPPORT 2121
USER ubuntu
PASSWORD 86659813
FTPDIR /var/www/html/load_file/loaddata/PalertPlus/serial_number/
Step 4. Save and close
Step 5. Press 4 seconds on the device start button to reload
Step 6. You are all set!
How to add a Palert ISO file to WMS?
Step 1. FTP connect to the station.
Step 2. Navigate to /home/pi/Desktop/vAlert/bin/vAlert8.cfg
Step 3. Change serial_number with the serial number of the device and copy and paste the code below at the end of vAlert8.cfg
###########################################
# API
###########################################
[API_CONFIG]
EARTHQUAKE_FALLING_API YES
ISO2631_FILE_UPLOAD YES
[VWHUB_CONFIG]
FTPIP 125.227.41.128
FTPPORT 2121
USER ubuntu
PASSWORD 86659813
FTPDIR /var/www/html/load_file/loaddata/PalertPlus/serial_number/
Step 4. Save and close
Step 5. Press 4 seconds on the device start button to reload
Step 6. You are all set!
How to enable DORTS on Palert Plus?
Step 1. FTP connect to the station
Step 2. Navigate to /home/pi/Desktop/vAlert/bin/vAlert8.cfg
Step 3. Copy and paste the code below at the end of vAlert8.cfg
###########################################
# DORTS
###########################################
[DORTS_VIBRATION]
BUILDING_TYPE 6
WARNING_DB -6
MAXIMUM_LATCH YES
Step 4. Save and close
Step 5. Press 4 seconds on the device start button to reload
Step 6. You are all set!
How to enable ISO2631 on Palert Plus?
Step 1. FTP connect to the station.
Step 2. Navigate to /home/pi/Desktop/vAlert/bin/vAlert8.cfg
Step 3. Copy and paste the code below at the end of vAlert8.cfg
###########################################
# ISO2631
###########################################
[ISO_2631]
LOCATION_TYPE 2
MAXIMUM_LATCH YES
Step 4. Save and close
Step 5. Press 4 seconds on the device start button to reload
Step 6. Youa all set! Now shake the device!
How to enable DIN on Palert S3?
Step 1. FTP connect to the station
Step 2. Navigate to /home/pi/Desktop/vAlert/bin/vAlert8.cfg
Step 3. Copy and paste the code below at the end of vAlert8.cfg
###########################################
# DIN
###########################################
[DIN_VIBRATION]
FFT_SECONDS 10
DISPLAY_ON_LCD YES
STRUCTURE_TYPE 2
GEO_PHONE NO
RECORD YES
RECORD_ALWAYS YES
WARNING_DB -6
PGA_RELAY YES
RELAY1_ON YES
MAXIMUM_LATCH YES
Step 4. Save and close
Step 5. Press 4 seconds on the device start button to reload
Step 6 You are all set, now shake the device!
Step 7. Open a browser and connect to device web interface
Step 8. Click on “DIN EVENT”
What is ISO2631?
ISO2631 is the international vibration standard which uses the vibration acceleration to set the standard.
See the vibration table below: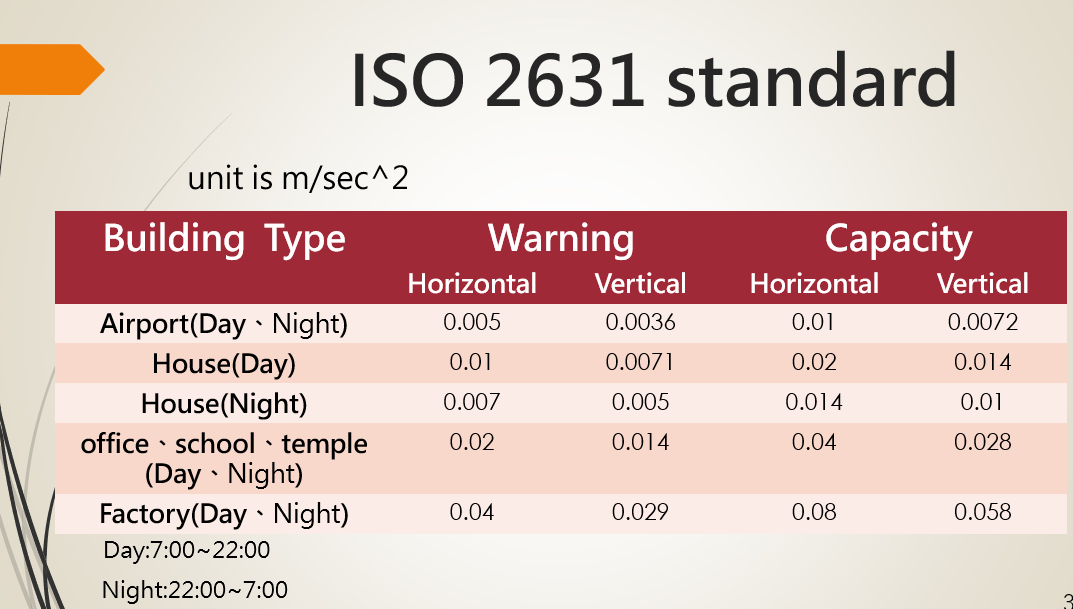
What is DIN4150-3?
DIN4150-3 is the German standard for vibration.
DIN4150-3 is to regulate the vibration impact on structures, on X-axis we have the frequency and the Y-axis the Peak Per Velocity (PPV).
Type 1 , Type2 , Type 3 are the types of structures with Type 1 being the least sensible to vibration and Type 3 being the most sensible vibration.
What is DORTS?
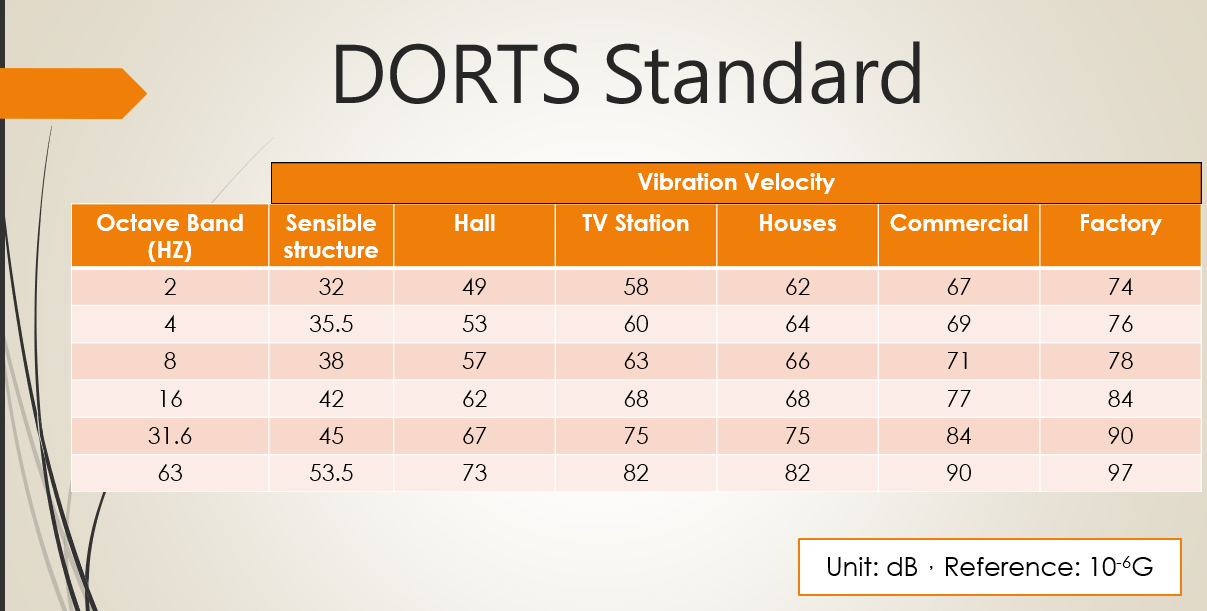
DORTS stands for Department Of Rapid Transit but is used on Palert plus to refer to the vibration standard used by the Department Of Rapid Transit in Taipei.
The vibration velocity used in this standard comes from an integration of the acceleration generated by accelerometers in the device.
See the standard table below for vibration:
What is the difference between Palert Plus /Palert S3/PX-01 Web interface?
1. Palert Plus Web interface has “DIN Daily” and “DIN EVENT” reports enabled in the left menu bar
2. Palert S3 web interface has “DORTS” and “ISO Daily” reports enabled in the left menu bar
3. PX-01 has none of the report above enabled on its menu bar
How to switch web version from Palert plus to Palert S3 or PX-01?
Step 1. FTP connect to station
Step 2. Navigate to /var/www/html/php/version.txt
Step 3. Change “Palert Plus” to “Palert Plus S3” or “Px-01”
Step 4. Save and refresh your web page
Recorded file chart displacement is 0
Step 1. FTP connect to station
Step 2. Navigate to /home/pi/Desktop/vAlert/bin/vAlert8.cfg
Step 3. Edit vAlert8.cfg , change “PD_TRIG_ENABLE NO” to “PD_TRIG_ENABLE YES”
Step 4. Save and press 4 seconds on Palert plus/Palert S3 start button to reload
Can’t upload file to Palert Using Palert
Step 1. Use Putty to SSH connect to the station
Step 2. Type the command ‘$ df -h’ and check the available storage
Step 3. If the available storage is 0 (which is most likely the case here), delete some files. If not, please contact TOM or TING for assistance.
Palert web streaming not displaying
Step 1. Open Putty
Step 2. SSH connect to station
Step 3. Type the command $ killall node
- If command returns no process named node, type the command “$ node” and enter
- If the command above returns “node:command not found”, type the command “$ sudo apt-get install node”
Step 4. Refresh web page
Why is Palert plus web interface blank?
Step 1. Open Putty
Step 2. SSH connect to station
Step 3. Navigate to /etc/php5/apache2/php.ini.
Step 4. Edit the file php.ini at the short_ open_tag=Off and Change “Off ” to “ON”.
Step 5. Save .
Step 6. Reload web page
COAP interface installation and usage
Please download full guideline here
FTP scripts
Purpose of project
Send ftp files and to a remote ftp server and resend them in case of connection faillure.
Note
ftp.sh is only sending the files modified in less than one hour .
Manual Usage
- Install FTP server on the Raspberry pi by running the command $ sudo apt-get update then $ sudo apt-get install ftp
- Move the ftp.sh file to /home/pi/Desktop/vAlert/bin
- Move the ResendFtpFiles.sh to the same folder as above
- Navigate to /home/pi/Desktop/vAlert/log
- Create a new file named /TobeUploadedList.txt
- Make sure that TobeUploadedList.txt is writable by running $ chmod 777 TobeUploadedList.txt
- Open a terminal (Mac Terminal , putty, Git Bash)
- Type $ ssh pi@<pi_ip_address>
- Login and Navigate to /home/pi/Desktop/vAlert/rec
- Edit a ramdom file
- Navigate to /home/pi/Desktop/vAlert/bin
- Run chmod +x ftp.sh
- Run $ ./ftp.sh
- Check that /home/pi/Desktop/vAlert/log/TobeUploadedList.txt has be written
- If /home/pi/Desktop/vAlert/log/TobeUploadedList.txt has been written Run $ chmod +x ResendFtpFiles.sh then$ ./ResendFtpFiles.sh
Crontab schedule Usage
- After Testing function with steps above you can schedule the scripts with Crontab to run periodically or at some specific hour of the day
-First you should createa file undert/etc name myftpLog.log by just running $ touch /etc/mydtpLog.log
- Then run $ echo “10 12 * * * /home/pi/Desktop/vAlert/bin/./ftp.sh >> /etc/myftpLog.log 2>&1” >> /etc/crontab
Palert/PX-01 web interface upgrade guideline
In this short guideline i’m assuming that you know how to:
– Use a FTP client (WinSCP)
– Set up a Palert station (Power and Ethernet)
– Git command line
Steps to upgrade to web interface:
1. Download the latest version
– Git : $ git clone http://gitlab.sanlien.com.tw/jean/palert-s3-web.git
– Or Manually download the latest version here(click on Palert and download the most recent www zip file)
2. FTP UPLOAD THE LATEST VERSION
– FTP connect to the station with WinSCP or Filezilla
– Navigate to “/var/www/html”
– Drag and drop the latest version that you just downloaded
Still can’t do it? Download the full guideline here

